App Builder \ PfJs Helper Class
Add GF Flow Button

App Builder & Automation Expert
Stay Updated with ProcFu!
Subscribe to our newsletter for the latest tips, updates, and automation insights.
Subscribe NowPfJs.addGfFlowButton(target, label, c, p, flow_id, item_id, css_class, click_func)This function enables the addition of a custom button to your application's user interface, which triggers a GlobiFlow/Podio Workflow Automation (GF) Manual Flow when clicked.
Arguments
- target (optional): The target variable from the On Render event, which typically represents the jQuery DOM wrapper of the current screen. By default, using 'target' places the button alongside form action buttons like 'Save' and 'Cancel'. If you wish to place the button in a different location, pass the ID of the desired
<div>instead of using 'target'. (Note: The term 'target' should be used exactly as is; it is not a placeholder to be modified.) - label: The text label displayed on the button.
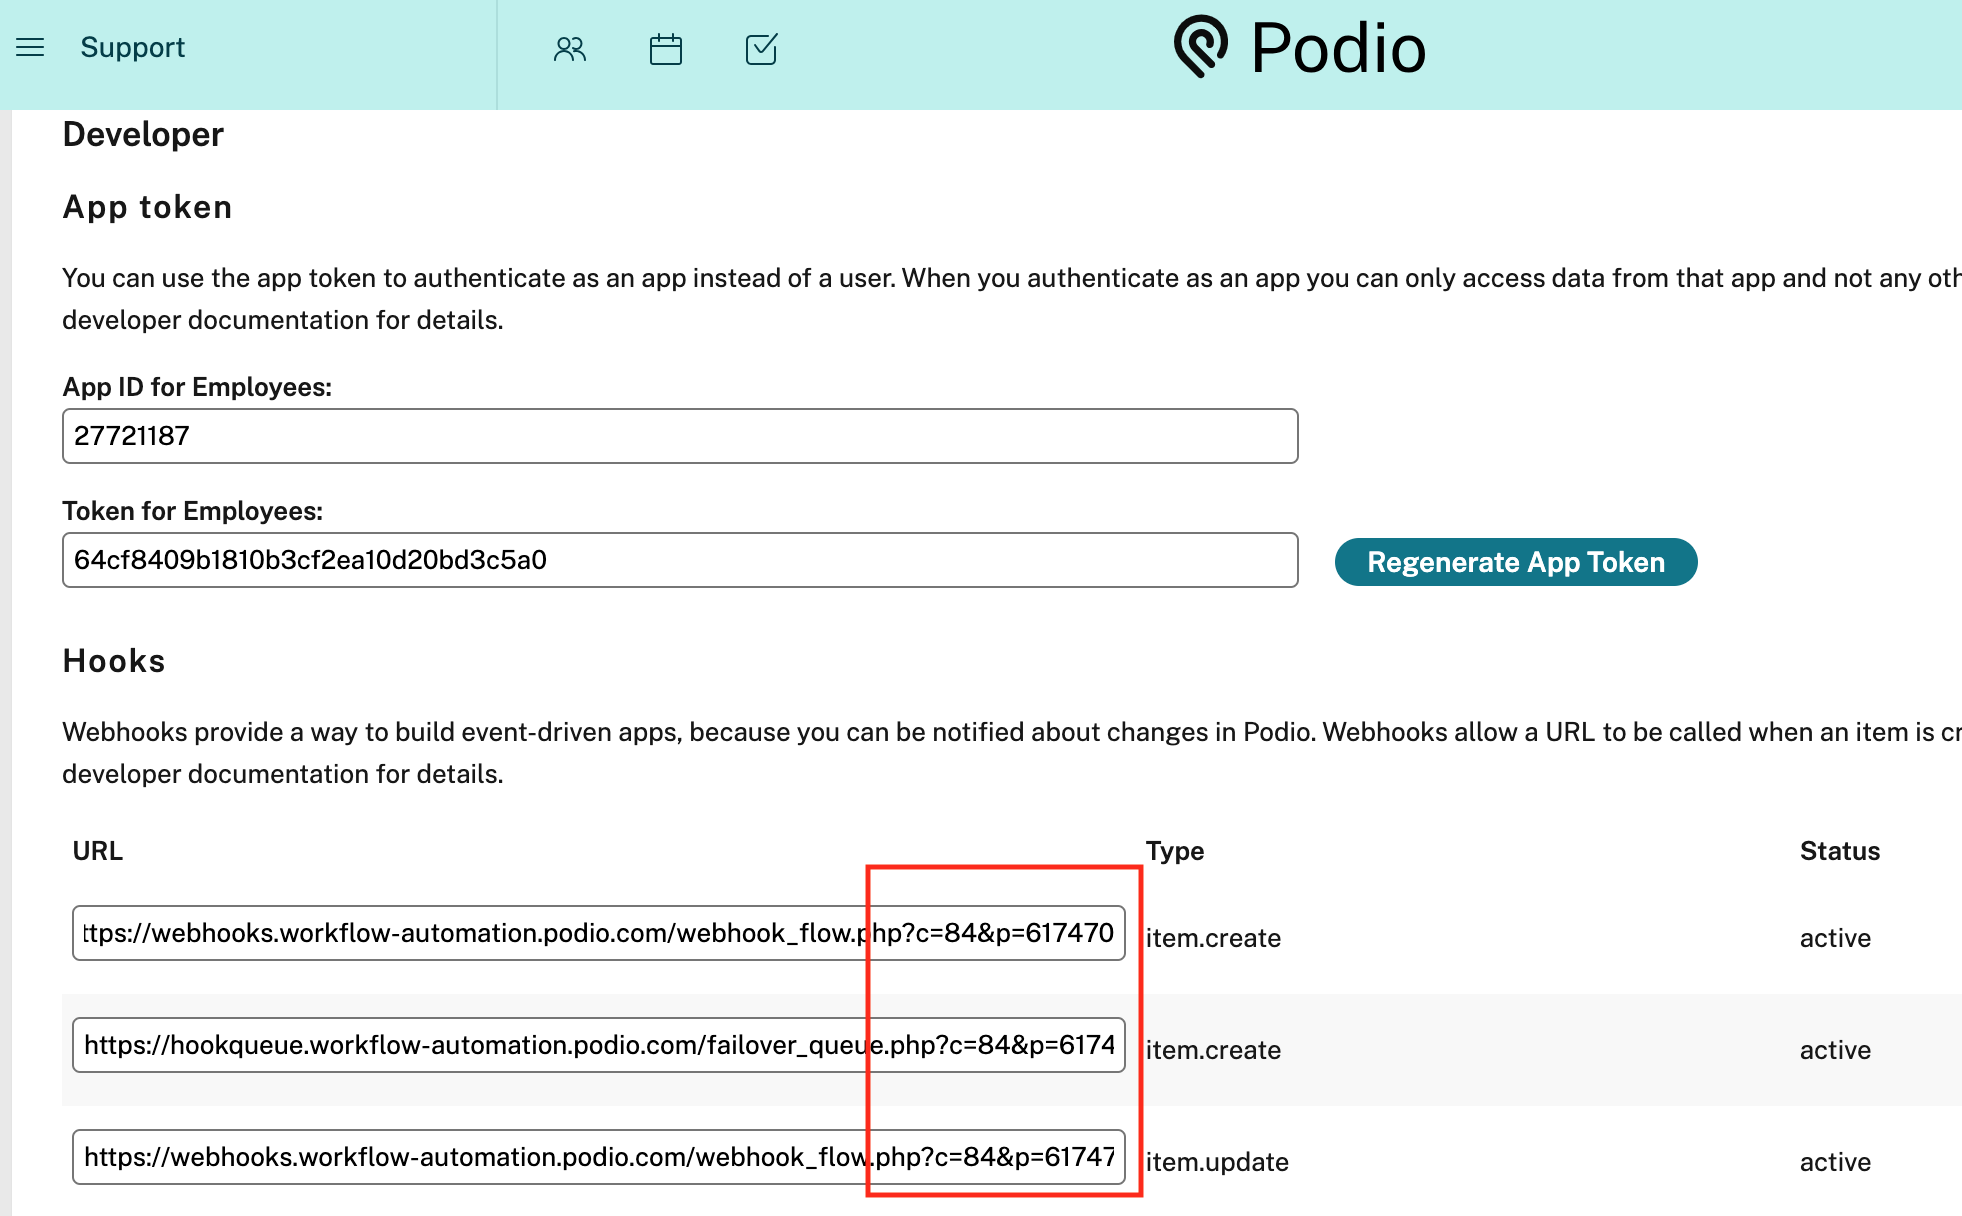
- c & p: The c (client) and p (profile) values associated with GF hooks in your Podio app. These values are critical for the correct execution of the flow and can be found in the developer section of your Podio app.
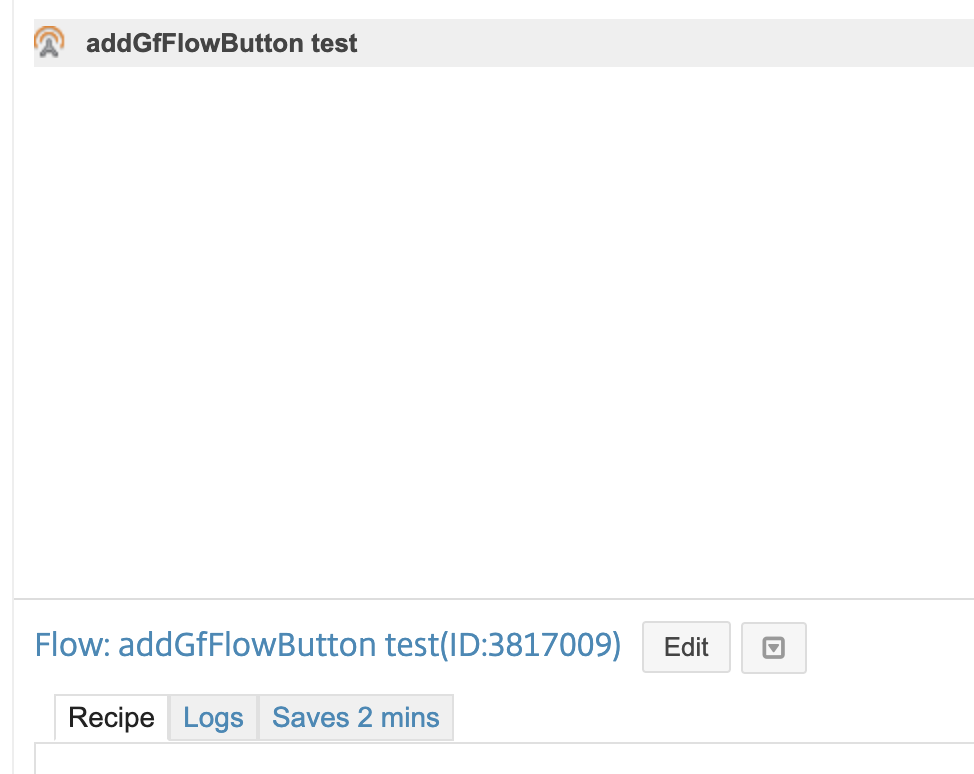
- flow_id: The ID of the GF flow that you want to trigger. This ID specifies which workflow is to be executed when the button is clicked.
- item_id: The ID of the item on which the flow will be triggered.
- css_class (optional): An additional CSS class that can be added to the button for styling purposes.
- click_func (optional): A JavaScript function that is called after the flow is successfully triggered. This function can handle post-execution logic or UI updates.
Usage
To use PfJs.addGfFlowButton, provide the necessary parameters as described. This allows you to customize the button's functionality and appearance to fit your application's needs.
Example: Setting Up a Trigger Button on a Detail Screen
This example outlines the process of setting up a button in a detail screen that triggers a GlobiFlow workflow on the item displayed. The item ID is retrieved during the "Before Render" event, and a button is dynamically added to the screen, configured to trigger a workflow when clicked.
- Step 1: Retrieve and Store the Item ID (Before-Render)
- First, in the "Before Render" event, capture the item ID from the current item and store it in a variable. This ID will be used later to specify which item the workflow should act upon.
-
my_variables.item = current_item["item_id"]; - This line of code retrieves the item_id from the current_item object, which represents the data of the item currently displayed on the detail screen, and stores it in my_variables.item.
- Step 2: Define the Callback Function (On-Render)
- Define a function that will be called once the workflow has successfully completed. This function can alert the user to the success of the operation.
-
function flowTriggered() { alert('Workflow completed successfully!'); } - Step 3: Add the Button to the Screen (On-Render)
- With the item ID stored and the callback function defined, you can now add the button to the screen using
PfJs.addGfFlowButton. This button will be configured to trigger the specified GlobiFlow workflow. -
label = "Trigger Flow";
c = 84;
p = 617470;
flow_id = 3817009;
css_class = "";
PfJs.addGfFlowButton(target, label, c, p, flow_id, my_variables.item, css_class, flowTriggered);